In theory, IQ managers have real-time store-room inventory counts at their fingertips at all times. Over time, the accuracy of what you have on hand versus what the system says you have is going to degrade. This is known in the warehouse business as “drift.” The cycle count is a procedure that combats drift.
Best practice is to devote some time every week to confirming the counts of a small sample of inventory items. Your IQ app tracks how often you cycle count an item with a default timetable of every 90 days. So if you count 8% of your SKUs every week, you will stay on target with that. If you have 1,000 SKUs, that would be 80 items to count every week, which is going to take no more than 30 minutes to do.
Like many features of your Inventory IQ system, there are multiple ways to accomplish the cycle count task:
- Guided count hosted by your scanner
- Self-directed count using your scanner
- Manual count from the IQ desktop app
You can use any one of these methods to keep your system calibrated, or you can use a combination of these methods.
IMPORTANT: Do not cycle count until you have posted all received shipments into the system! If you are unsure what this means, call our help desk at 800 743-9401.
Guided Count
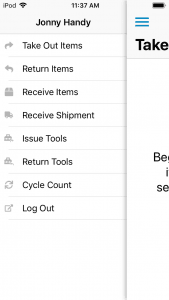
When you select CYCLE COUNT from the menu on your scanner, you will see a list of items to count. In a new installation, there won’t be any items on the list until a week before your 90-day anniversary. If you have a new installation, see the section below for special instructions.
Beginning with the item at the top of the list, locate that item in the store room and count the inventory you have on hand. Tap the item on the scanner to bring up the counting screen, enter the count, and select SUBMIT. The item count will now be updated throughout the system and this item will not show up in the COUNT ITEMS list again for another 83 days. Continue this process with the subsequent items on the scanner screen until there are no more items showing. If there are too many items to count in one session, you can interrupt the cycle count at any time and resume again at your convenience.
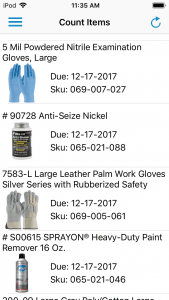
The items displaying in the COUNT ITEMS list are organized by the length of time since they were last counted. The list will likely send you to random areas of the store room counting one item over here, and the next one over there. For this reason, many users prefer to use the self-directed counting system detailed in the next section:
Self-Directed Count
After you select CYCLE COUNT from the menu on your scanner, you do not have to follow the list of items suggested on your scanner screen. You can count any item simply by scanning the desired item in CYCLE COUNT mode. The count window will pop up once the bar code is recognized. Enter the count and select SUBMIT.
Using this method, you can work your way through your store room a section at a time. If you divide your store room into 12 or 13 sections and count a different section in order each week, you can count every item in your store room every 90 days. Once you get on this routine, after 90 days the items suggested on the COUNT ITEMS screen on your scanner will become the same items you are scheduled to count next. This synchronization can be useful because you will be able to see if you missed any items if they still display on the screen after you have finished your count for the week.
Manual Count from IQ Desktop App
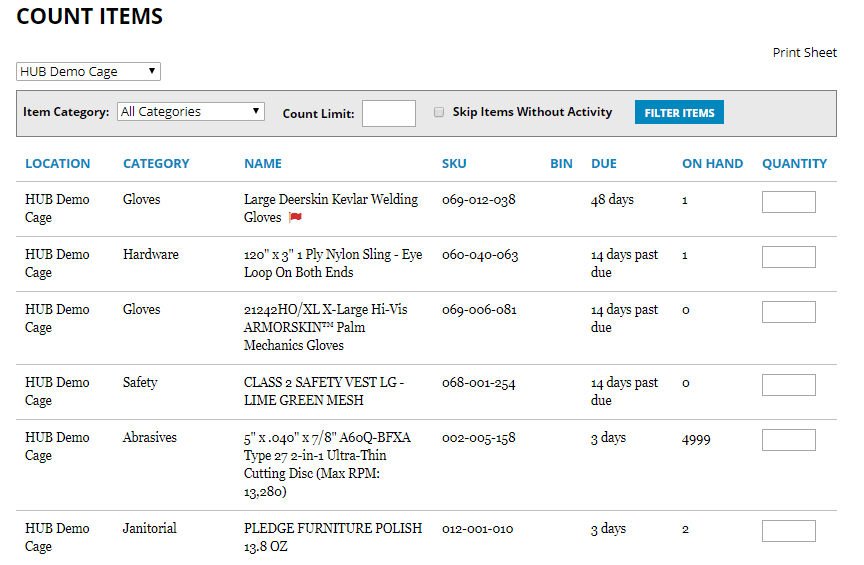
Adjustments to your counts can also be made using the Count Inventory link on the Inventory IQ page when you are signed in to your www.hubindustrial.com account.
While it is possible to do a cycle count using the desktop app, there is no benefit to using this method if there is a scanner available. However, there is good information on this page that may prove useful in some capacity or other. It can be helpful to management for
- Seeing at a glance if cycle counts are being performed on schedule
- Viewing cycle count data from multiple locations (if multiple store rooms are being employed)
- Flagging items in need of counting ahead of schedule
The information on the COUNT ITEMS page will list every item in the system in order by to how close the item is to being due for its cycle count. The “DUE” column will list the number of days until that due date. If it shows a “past due” date, that indicates the number of days the item has exceeded the due date for being counted. Unless you have changed the count schedule for any category of item, the default schedule will be 90 days.
In the example image, we see the top line in the list has a red flag icon and a due date of 48 days. Even though this item does not need to be counted for 48 days according to the schedule, it appears at the top of the list because an attempt has been made to take out more of this item than the system shows to be on hand. While any transaction with an unexpected outcome will generate an incident report to be reconciled in the INCIDENTS menu, it will also throw a flag here in the cycle count list because it is quite likely that the quantity on hand is not accurately showing in the system.
The following 3 items show due dates of “14 days past due.” These have exceeded the expected cycle count schedule by 14 days and need to be counted as soon as possible.
The next 2 items show a due date of 3 days, indicating they are within 3 days of attaining their due date.
The empty fields in the QUANTITY column provide the option of manually entering the corrected count without the use of a scanner. It would be possible to print out pages of this list to take to the store room to manually write the counts onto the pages and subsequently transfer those numbers onto this web form as a way of performing a cycle count, but again, there could scarcely be a valid reason to do it this way instead of using a scanner. If someone accessed the store room and removed an item in between your counting of it and entering it into the online form, then the cycle count would already be inaccurate.
It is also possible to filter your list by using the fields at the top of the page. If you have more than one IQ location in your system, you can view “All Locations” or you can select a specific location from a drop-down list. In this example, the selected location in “HUB Demo Cage.” You can also filter for specific categories, limit the items that display by a number of your choosing, or if you check the “Skip Items Without Activity” box, you will exclude any items on the list that have not seen any removals or additions since they were last counted. The filter will activate only after you select the “FILTER ITEMS” button.
Advice for New Systems
All items added to a new installation will start their cycle count calendar on essentially the same day. Since the CYCLE COUNT feature on the scanner will only begin to remind you of items due for counting 7 days before they are due, this feature will not prompt you to count anything for months. If you wait for the list on the scanner screen to start populating before you count any items, when you do approach the due date for the first item, you will discover that your entire inventory will all be due for counting on the same day.
In addition, the initial weeks of a new system are likely to be a period of time when drift happens at an accelerated rate due to the large number of new users and the mistakes new users are likely to commit.
To get started down a sustainable cycle count path, we recommend you institute a weekly plan from the outset using the self-directed count method described above at least for the first 3 months. If you want to switch to the guided count after that, you will find it will follow the pattern you have established during the 3-month break-in period.