If you have more than a few items you want to set up in the system, you can add them in bulk with an import. This bulk import can be done for either non-HUB items or items you are getting through HUB.
Also, this tool can be used to perform mass edits of items you may already have in your system.
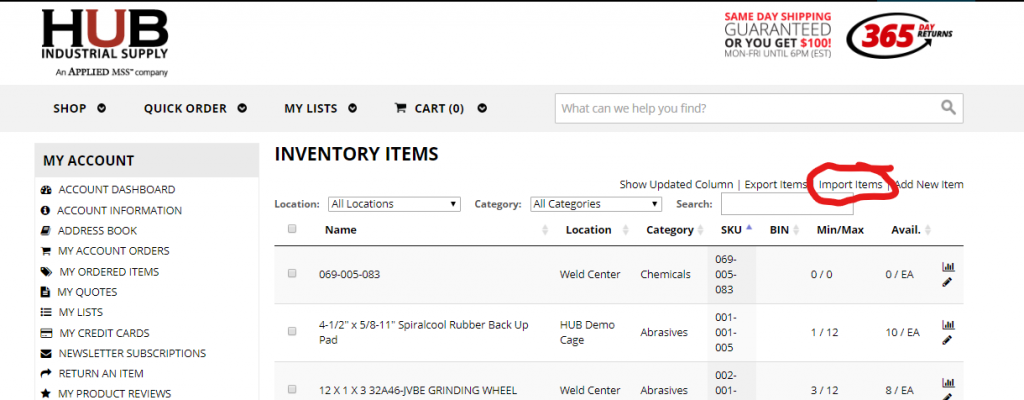
To get started, go to Items in the SETUP menu. At the top of the page, there is a link to the Import Items page which opens up the page we need when you click on it.
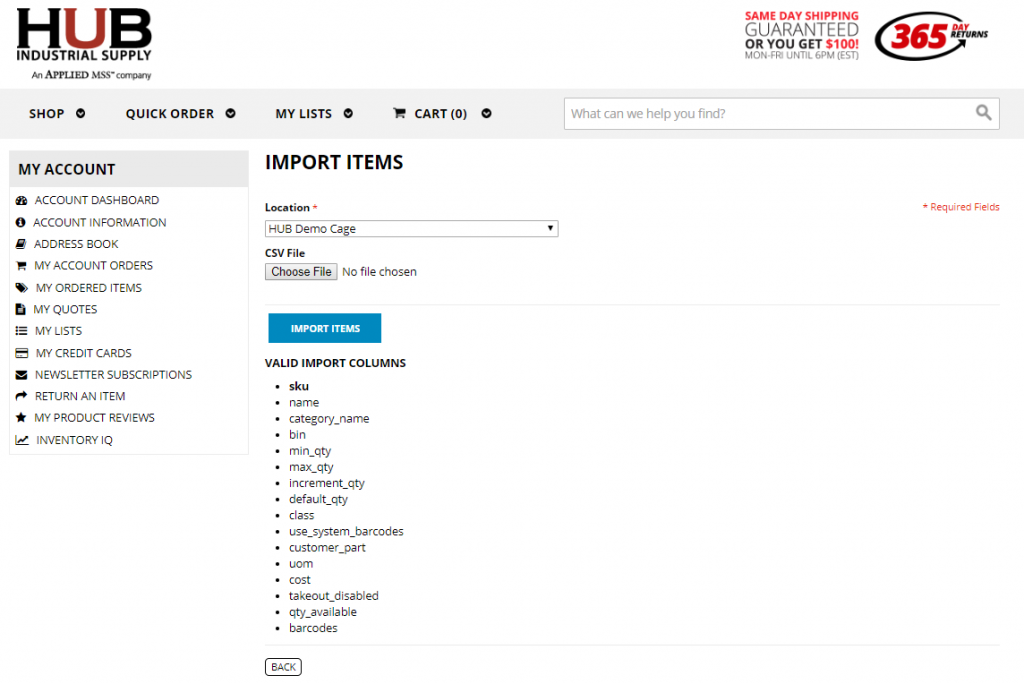
Pay very close attention to the VALID IMPORT COLUMNS on the bottom half of the page. You will be listing the items you are importing on a spreadsheet, and the header columns on your spreadsheet must match these column heads exactly. Notice the heads are all lower case, and in place of word spaces, there are underscores. I will be explaining each of these functions at the end of this video.
You do not have to include all these column heads on your spreadsheet, and they don’t even have to appear in the order listed here.
We do not recommend combining HUB SKUs and non-hub SKUs on the same import. If you are wanting to import HUB SKUs, watch the tutorial Bulk Importation of HUB SKUs, which addresses the unique considerations for native products available through HUB.
When importing new (or editing existing) non-HUB items, the more information you can supply will benefit you in the long run. I will detail the options in a moment.
If you have any doubts about how the import will treat something, it’s a good idea to run a test import with just a few SKUs to see if the values import as you would like them to. If you do run an import that adds incorrect values to one or more of the fields, you can correct it by running an import including the affected SKUs using just the SKU and the columns that need editing with the corrected values included.

Here is a sample spreadsheet with a list of Non-HUB SKUs. The sheet provides the SKU, product name, category name, barcodes, supplier cost, the current inventory count of the item, and min/max values. Skip to the table below to see an explanation of all the possible information that can be exported.
The first step after compiling your list is to save your spreadsheet as a comma delimited CSV. Make sure you choose the correct option, because there are other CSV options, and the comma delimited option is the one we guarantee to work.

Now go back to the import page and make sure that the Location is set correctly. If you have multiple locations, you have to import separately to each location you wish to import to. Place your .CSV file in the field shown and hit IMPORT. You will see a message displayed at the conclusion of the import to let you know if the import was successful or not and if so, how many items were imported.
If you hit the BACK button, you can search for one of the items in the import to verify that all the data was properly imported.
Now I will go through the list of VALID IMPORT COLUMNS and list possible scenarios of how they might come into play in the import of non- HUB items:
| sku | This alphanumeric unlimited text field is the one unique identifying tag that you will not be able to change later. You can use your own system or borrow the SKU supplied by the supplier. When you print bin labels, the barcode will be derived from this SKU |
| name | The name of the product as it will appear on the label |
| category_name | Assigns product to a category such as Safety or Tools. If the category name added does not match the category list already in use in your system, it will add the new name to the list of categories |
| bin | Lists location of the product in your store room |
| min_qty/max_qty | The “min” level triggers a re-order to return to the level you set as the max |
| increment_qty | Unit size that will be ordered when replenished |
| default_qty | Takeout quantity Example: if users take out pairs of earplugs vs. a box of earplugs as the takeout quantity |
| class | Text field for customer designation, for example accounting class for reporting. |
| use_system_barcodes | Not relevant to non-hub items |
| customer_part | Optional field for mfr part no. |
| uom | Default is ea. |
| cost | The price you pay your supplier |
| qty_available | If you have pre-existing stock of this product, listing it here will adjust inventory levels without showing it as received. If this column is employed on items previously added in the system, it will treat the number here as a cycle count |
| barcodes | List alphanumeric values of any additional barcodes here, separated by commas. If you want to add a SKU from a product barcode, list the entire 12-digit number with no spaces or dashes. |
If you need assistance doing a bulk import, give us a call and we’ll be glad to help you through the steps.