In part 1 of this tutorial, we showed you how to take out inventory items from the store room.
It’s time to dive a little deeper into the features of the Inventory IQ system, and to do that, we need to be clear on some of the terminology.
Definition of Terms: Your store room can hold Items, and it can also hold Tools. Items are the consumable supplies that you take out of here and discard or recycle after they are used. They don’t normally get returned to the supply room after you scan them and take them out.
Tools are assets that live in the store room, but are allowed to be borrowed with the expectation that they be returned to the store room. These are things like power tools that may be shared among team members. More information about tools is available on the ISSUE TOOLS tutorial. The important thing to understand at this time is that there may be stuff in your store room that are not considered “items,” and the barcodes associated with them will not work when your scanner is in Take Out Items mode.
Operational Modes: When you first log into your scanner as described in part 1 of this video, your scanner defaults to TAKE OUT ITEMS mode. This makes things very simple since most of the time, you will be in the store room because you want to take out items. However, if you tap the menu icon at the top of your scanner, you will find other modes in which you can transact business inside the store room.
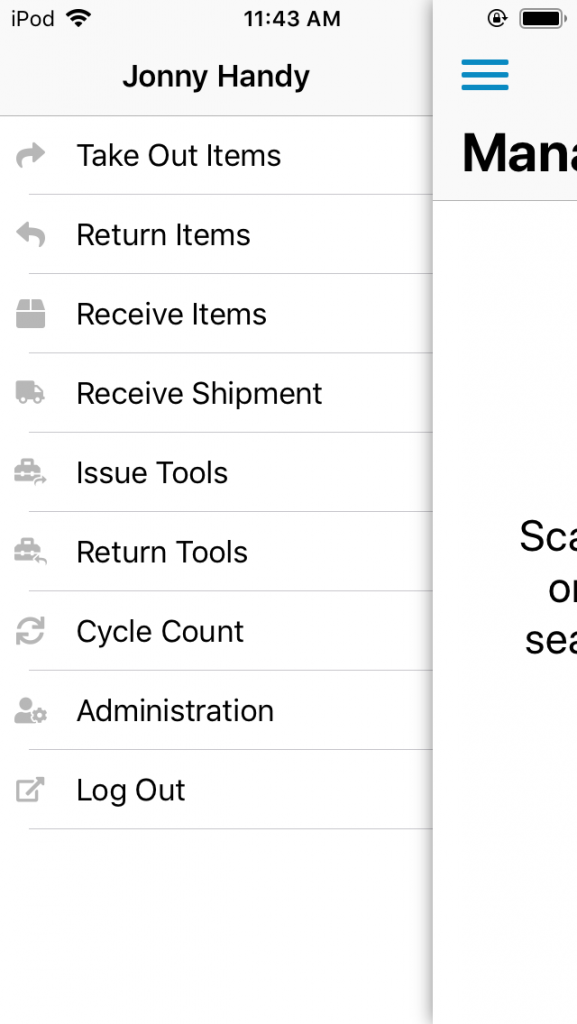
Depending on the permissions you have been granted by your manager, you will see between 3 and 9 menu options on this page. You can find out about the other options in other videos. As we have said, the default mode is TAKE OUT ITEMS mode. The only other mode available to all users is the RETURN ITEMS mode.
Return Items Mode: We said earlier that items don’t normally get returned because they get used and then discarded or recycled, or they become part of an assembly. But sometimes you will want to return an item, and when you do, you will use the RETURN ITEMS mode.
Examples of valid reasons to use RETURN ITEMS are:
- You check out a pair of gloves and realize when you get back to your work station that you got the wrong size
- You check out 40 fasteners for a project and end up with 10 left over that you wish to return
It is very important that you understand that the RETURN ITEMS mode should not be used for other situations when you want to bring something into the store room, such as:
- Receiving new items, either from HUB or any other vendor
- Returning a tool
Not every user of the Inventory IQ system will be authorized to perform these and other operations, and If you have been granted these permissions, you can learn the procedures by viewing other tutorials. If you are unsure whether RETURN ITEMS is the correct mode to use to return something, check with your supervisor.
Job Codes: In Part 1 of this tutorial, we introduced the option of assigning job codes to transactions. Switching between modes will remove the code, so you have to add the code after every switch if your supervisor instructs you to use job codes.
Example Transaction: You have taken out the wrong gloves and you want to return them to inventory. You authenticate, enter the store room, and pick up the scanner to log in. You find your name and touch it to log in. You go to the menu and select RETURN ITEMS. If you are using job codes, now would be when you would enter a code. You scan the glove bar code and put the gloves away. Hit SUBMIT to record the transaction, put the scanner back in the charger and exit the store room.
You are now equipped to handle the basic Take Out and Return Item operations of the Inventory IQ System.